利用GitHub Action实现Hugo博客在GitHub Pages自动部署
作为一名IT民工,善于利用各种工具提升工作效率才算合格,本文简单记录自己如何利用GitHub Actions实现个人Hugo博客在GitHub Pages中的自动化部署。
传统方式
自己的个人博客创建于2016年,在这期间自己一直基于如下方式创建并部署更新博客:
-
利用
hugo命令创建对应的博客markdown文件hugo new post/hugo/using-github-action-to-auto-build-deploy.md -
利用下述命令开启
hugo博客的动态监听展示,并进行编写hugo server -w -D -
博客内容编写完成后,利用下述命令将其切换到实际部署环境
hugo server --baseUrl="https://lucumt.info/" --watch=false --appendPort=false --renderToDisk --environment production -
执行下述命令提交到
master分支git add -Agit commit -a -m "xxxx"git push origin master
-
利用下述命令将
public目录中的内容从master分支同步到gh-pages分支git subtree push --prefix=public git@github.com:lucumt/ghblog.git gh-pages
上述过程中的1,2,4阶段是编写博客的必经阶段,而3,5阶段其实没太多必要,完全可以用工具自动化实现。作为IT从业者,我们需要尽可能的减少不必要的操作。
改进方式
结合网络上的相关资料,自己把实现方案定在了GitHub Actions和Travis CI二者之一,考虑到GitHub中已经内置了GitHub Actions ,最终解决采用其作为实现方案。
在Hugo的官方文档Build Hugo With GitHub Action中也推荐采用GitHub Actions作为持续集成部署方案,并提供了相应的流水线配置代码:
|
|
该配置代码已经很完善,个人根据实际情况对其做了如下修改:
- 在Build阶段,将
hugo命令改为适合个人环境的hugo -b "https://lucumt.info/" -e "production" - 在个人
GitHub中设置github_token
其中关于github_token的配置可按如下步骤配置:
-
在个人
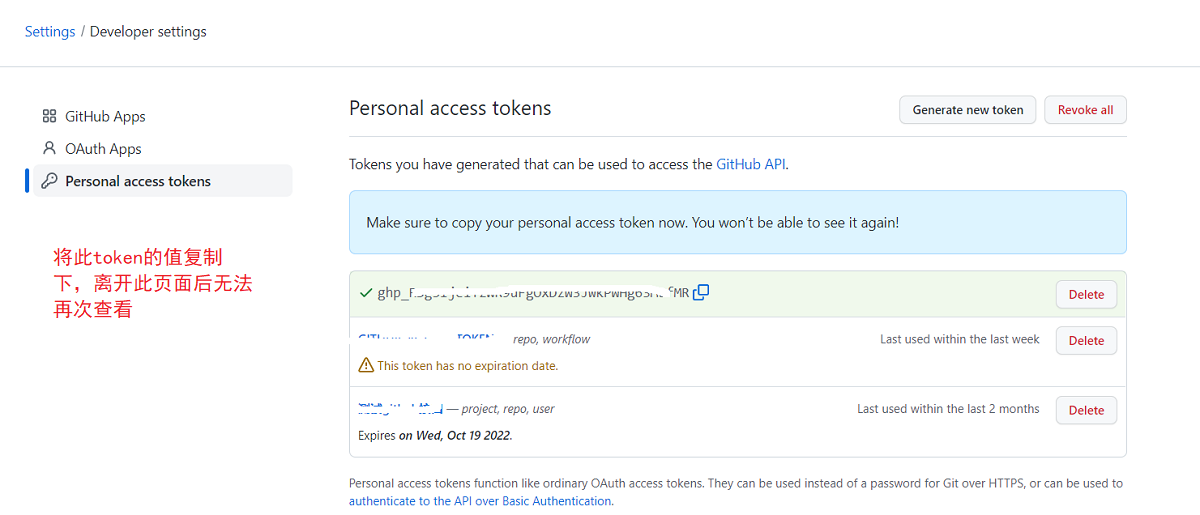
GitHub页面,依次点击Settings->Developer settings->Personal access tokens进入如下页面:
-
点击
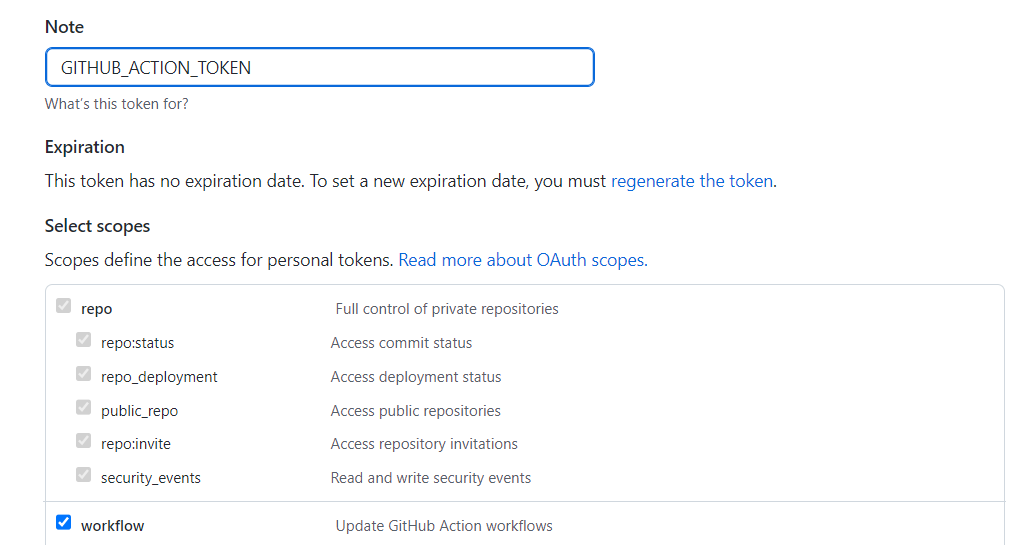
Generate new token出现如下界面,在Note中输入名称,在Select scopes选择workflow
-
将生成的token复制出来为后续创建
secret做准备,注意必须及时复制,一旦离开此页面后续就无法查看其值,只能重新创建新token:
-
进入对应的
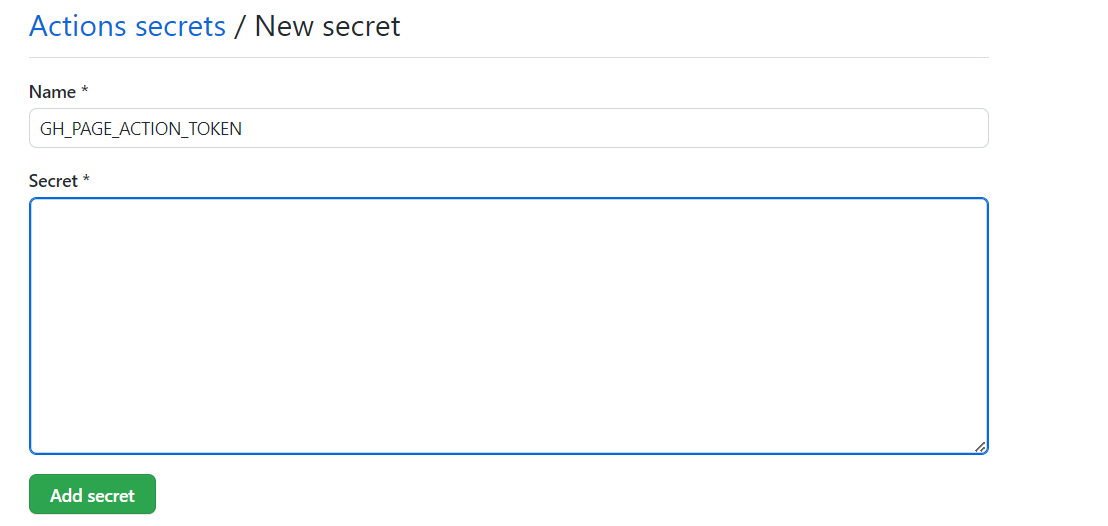
GitHub项目下,依次点击Settings->Secrets->Actions进入添加Action secrets的界面,点击New repository secret按钮
-
在出现的界面中
name部分输入我们设置的值,Secret部分输入步骤3中记录的token值,然后点击Add secret按钮
需要注意的是
name的值不能以GITHUB_开头,否则创建会出错
-
在流水线中将
github_token值设置为步骤5中secret的名称,类似${{ secrets.GH_PAGE_ACTION_TOKEN }}s,至此github_token设置过程完毕。
配置后完整的流水线代码如下:
|
|
将该yaml文件放到对应GitHub项目下的.github/workflows目录下即完成全部配置。
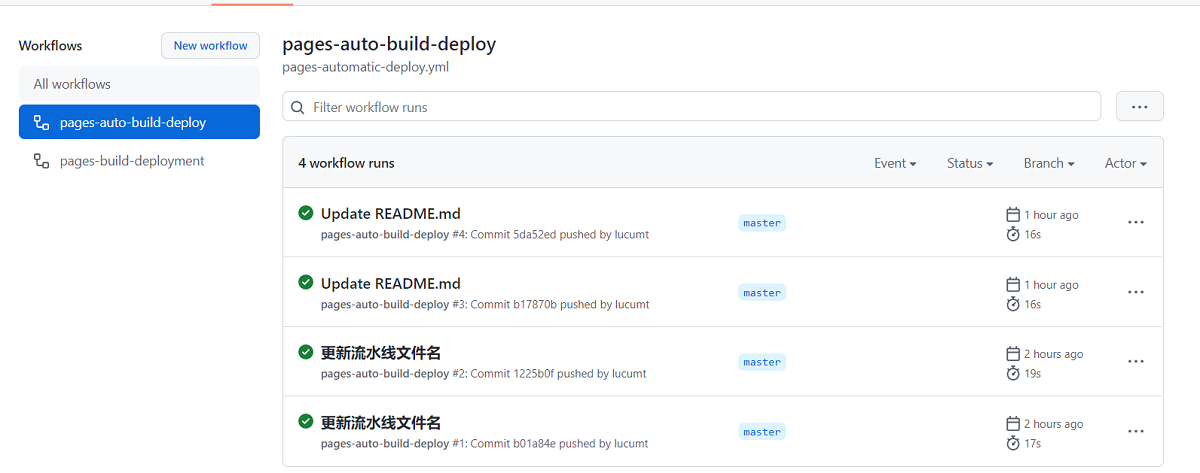
当执行git push origin master后,GitHub Actions会开启自动构建部署,运行结果如下,至此整个设置过程完毕!

其它
由于GitHub Action支持定时语法,将流水线触发条件修改如下
|
|
可实现每天上午8点自动触发构建,由于构建过程中会往gh-pages分支下提交代码,从而间接达成在GitHub中每天提交代码,在GitHub主页面展示时保持全绿的功能!1

参考文档:
- https://www.ruanyifeng.com/blog/2019/09/getting-started-with-github-actions.html
- https://www.pseudoyu.com/zh/2022/05/29/deploy_your_blog_using_hugo_and_github_action/
-
个人观点质量优于数量,不推荐这么做 ↩︎

